 (423) 618-4477
 office@raylawns.com

PROJECT CASE STUDY
Before & After: Chattanooga Bermuda Sod Installation


This retired Chattanooga couple wanted to replace approximately 7,500 square feet of their existing front lawn with Bermuda sod. Ray Lawns treated the old growth, removed a maple tree and its roots, cleared debris, prepared the soil, and installed 15 pallets of new sod. The project required two days of ground preparation followed by one installation day, giving the home a cleaner lawn that follows the property’s new sidewalk layout.
What Wasn't Working
The homeowners wanted a fresh front lawn surrounding their newly installed sidewalks. The defined project area covered approximately 7,500 square feet, including the two lawn islands formed by the concrete walkways. The sloped section on the uphill side of the driveway was not included in the installation.
The existing lawn could not simply be covered with new sod. Grass and weeds were still growing across the property, and a maple tree occupied part of the installation area. Its roots, along with the surrounding rock and mulch, needed to be removed before the soil could be loosened and graded.
Preparing the lawn correctly would help the new Bermuda sod sit against the soil rather than resting over old roots, thatch, rocks, or uneven ground.

Our Approach
Ray Lawns developed a staged preparation plan rather than trying to remove the existing lawn and install sod during the same visit. The first grass and weed treatment was scheduled about one month before installation. A second treatment could then be completed approximately two weeks later if any live growth remained.
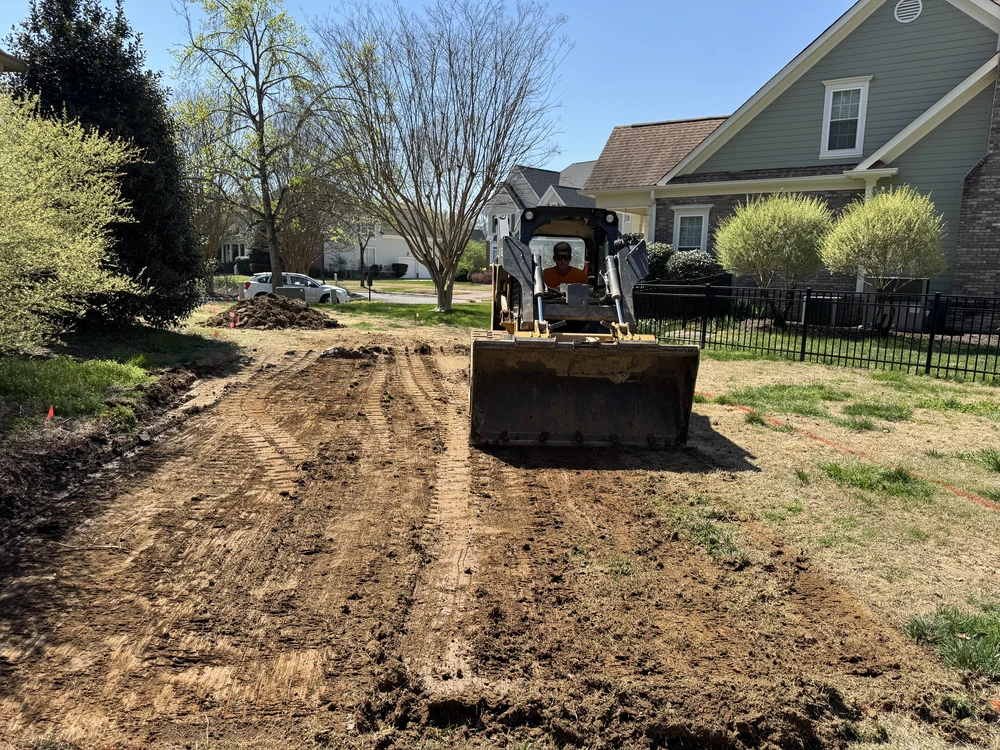
Once the old lawn had died back, the maple tree, roots, mulch, and surrounding rocks would be removed. A Harley rake would loosen the exposed soil and collect buried roots, thatch, and stones. The crew could then haul away the loosened debris and use a skid steer bucket to shape the installation area.
The final stage called for 15 pallets of Bermuda sod. Each piece would be fitted closely along the new sidewalks and around the two lawn islands before the completed lawn was watered and rolled.

Keeping the Installation Within the Defined Area
The new sidewalks divided portions of the front yard into two separate lawn islands. These areas were included in the sod installation, but the uphill slope beside the driveway remained outside the project scope.
Keeping that boundary clear allowed Ray Lawns to prepare and sod the approved lawn without disturbing an area the homeowners had chosen to leave unchanged.

Clearing the Site Before Grading
The plan also accounted for the material that had to be removed before grading could begin. After the existing growth died back, the maple tree, roots, mulch, rocks, thatch, and other debris would be cleared so the Harley rake and skid steer could work across exposed soil.

Building the New Lawn From the Ground Up
Ground preparation was a major part of the project. The goal was not to hide the existing conditions beneath the Bermuda sod. Ray Lawns needed to remove loose material, loosen the surface, and create a smoother grade before the first pallet was opened.
This preparation gave the sod a cleaner surface for establishing roots and helped the completed lawn follow the sidewalks without abrupt dips or uneven transitions.
Step-by-Step Overview
Advance Grass and Weed Treatment
Approximately one month before the scheduled installation, Ray Lawns treated the existing grass and weeds throughout the defined 7,500-square-foot lawn area. This included the two islands surrounded by the new sidewalks.
The treatment was given time to work before the equipment-based preparation began. A second visit was planned roughly two weeks later if any active growth remained.

Maple Tree and Root Removal
The maple tree in the front lawn was removed along with its roots. Ray Lawns also collected the rock and mulch surrounding the tree. These materials were moved to the wooded area behind the home, as discussed with the homeowners.
Removing the roots opened the full area for preparation. The crew could grade through the former tree location rather than shaping the new lawn around buried material that might later settle or interfere with the sod.

Harley Raking and Debris Removal
Ray Lawns used a Harley rake across the front lawn to loosen the soil and bring buried material to the surface. Thatch, roots, rocks, and other debris were collected into piles instead of being left beneath the Bermuda sod.
The crew then scooped up the material and hauled it away. This step exposed the soil needed for grading and removed obstacles that could have left high spots or gaps beneath the new lawn.
Grading Around the Sidewalks
After the debris was removed, a skid steer bucket was used to grade and smooth the soil. The crew worked carefully around the sidewalks and the two lawn islands so the sod could meet the concrete with a clean, close edge.
The excluded slope on the uphill side of the driveway was left unchanged. The preparation remained within the installation area established with the homeowners.

Installing the Bermuda Sod
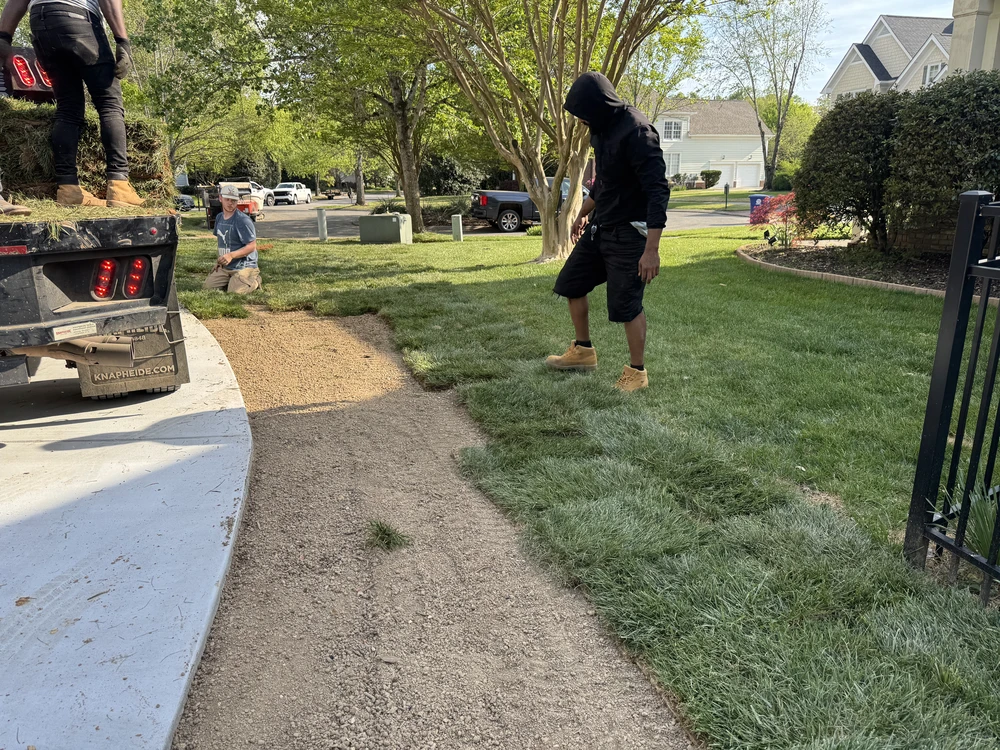
Once the grade was ready, Ray Lawns delivered and installed 15 pallets of Bermuda sod. The pieces were placed tightly together across the main front lawn and fitted around the concrete edges of both lawn islands.
Close placement helped reduce visible seams and made the individual sections appear connected across the property. The sidewalk curves and corners required careful cuts so the new turf could follow the hardscape without leaving exposed soil.

Watering, Rolling, and Starter Fertilizer
The sod was watered as installation moved across the property. This prevented the newly placed Bermuda grass and exposed soil from remaining dry while the crew worked through the remaining pallets.
Once every piece was in position, the crew used a sod roller to press the turf against the prepared soil. Starter fertilizer was provided at completion to support the lawn as it began establishing.

What Changed
The completed lawn now follows the home’s new sidewalk layout with Bermuda grass fitted closely along the concrete. The two lawn islands remain clearly defined, while the same turf continues across the main portion of the front yard.
The preparation beneath the lawn played an important role in the visible result. Removing the maple tree roots, pulling out loose debris, loosening the soil, and smoothing the grade gave the sod a cleaner base. Ray Lawns did not cover unresolved material and leave it beneath the new turf.
The uphill slope beside the driveway remained unchanged, as established in the original scope. Across the approved installation area, approximately 7,500 square feet of new Bermuda sod replaced the previous lawn.
Project Outcomes

Ground Preparation
Treated the existing grass and weeds before removing the maple tree, roots, rock, mulch, thatch, and loose debris from the installation area.

Bermuda Sod Installation
Installed 15 pallets of Bermuda sod across approximately 7,500 square feet, including the two lawn islands created by the new sidewalks.

Final Details
Watered the sod during installation, fitted the turf along the concrete, rolled the completed lawn, and provided starter fertilizer.
3-DAY ON-SITE TRANSFORMATION
This Chattanooga front lawn received two days of detailed ground preparation followed by one day of Bermuda sod installation. The $11,000 project replaced approximately 7,500 square feet of lawn while leaving the excluded driveway slope undisturbed.


Careful ground preparation created a stronger starting point for the new Bermuda lawn
This Chattanooga Bermuda sod installation shows why a lawn replacement begins well before the first piece of turf is placed. Ray Lawns treated the old growth, removed the maple tree and roots, cleared away loose material, loosened the soil, and shaped the grade before installing the sod.
With 15 pallets fitted around the new sidewalks and lawn islands, the property gained approximately 7,500 square feet of fresh Bermuda grass. The completed lawn gives the homeowners a cleaner front yard while keeping the installation within the boundaries they originally approved.
Ready TO start your transformation?